Published on - September 6, 2018 An Easy Way to Archive Mail in MS Outlook

Archiving your emails in MS Outlook is just another way of creating spaces in the email client. As we all know that our email client is flooded with many emails in which some are useful but some are not. When your mailbox becomes cluttered and messy this makes your MS Outlook sluggish or makes your files inaccessible. To avoid all these issues you need to archive your emails in MS Outlook. The entire process of the archive is quite easy so, let’s start auto archiving in MS Outlook 2016.
To turn on the Auto archiving settings in MS Outlook to need to gone through with following steps:
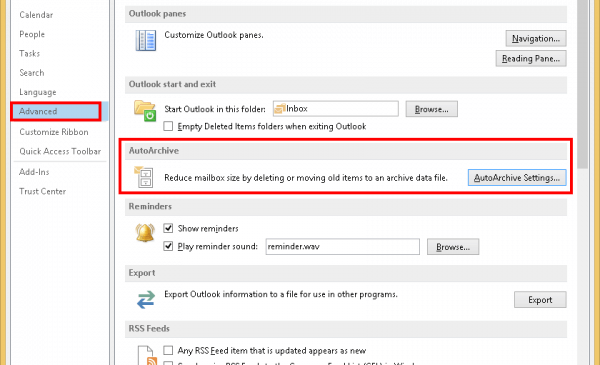
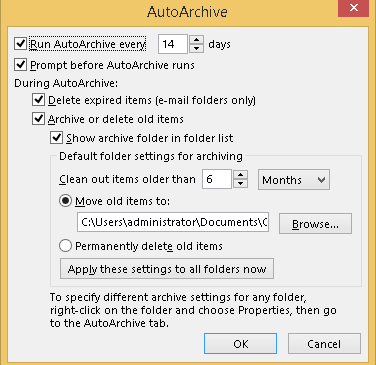
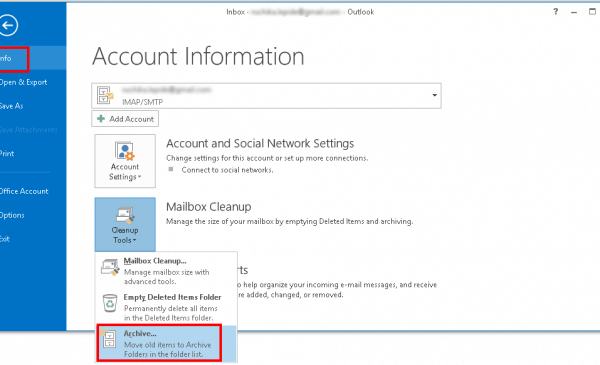
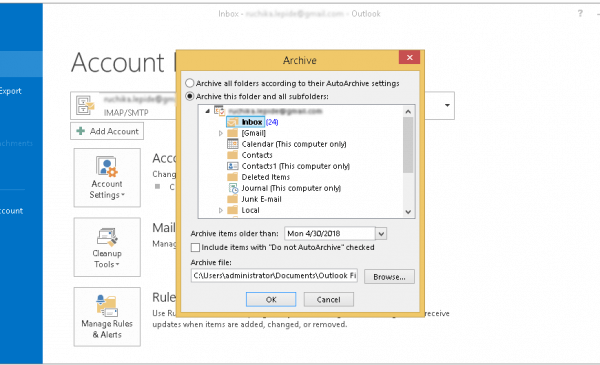
If you want to archive emails in MS Outlook 2016 then you have to follow some steps, use the following steps to archive emails.
Kernel introduces a fully automated approach to reduce the size of your Outlook PST file and prevent your Outlook to become sluggish. Kernel for PST Split is an efficient tool that can split up your single PST data into multiple and small PST files. Some of the prominent features of the tool are enlisted as follows:
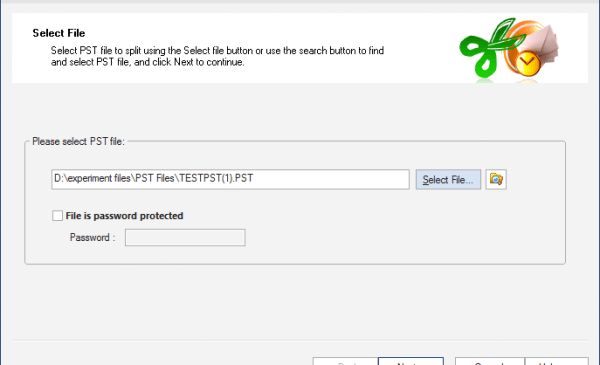
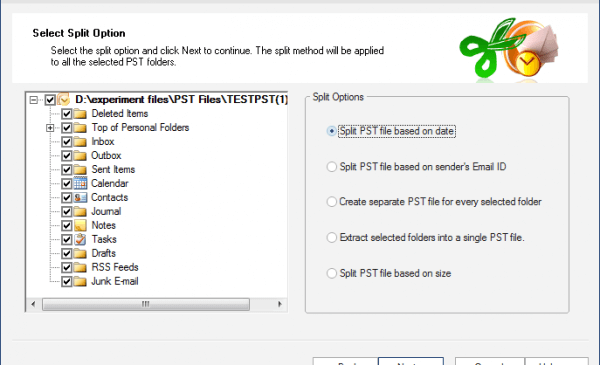
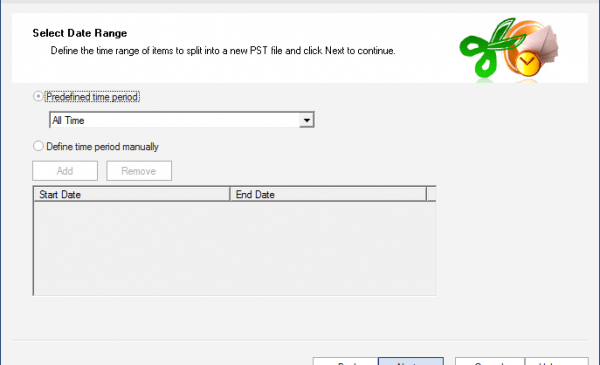
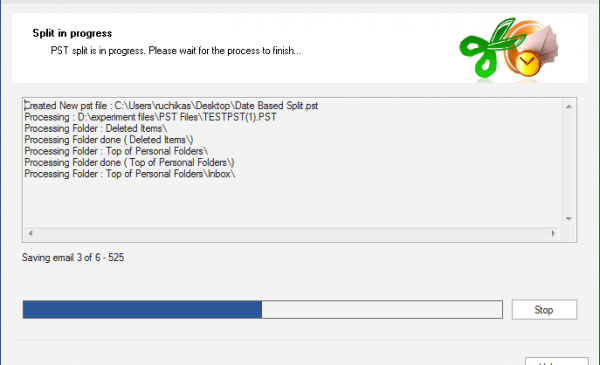
To split your PST file with Kernel for PST Split you have to follow below steps:

How to Redirect External Mails to Another Folder in Outlook?

Export AOL Emails to Hard Drive

Open PST File Without Outlook

How to delete duplicate Calendar entries in Outlook 2016?

How to Merge PST Files Using Outlook 2016?

Open OST in MS Outlook 2019, 2016, and 2013