- My C: Drive is full; Can I move my Outlook OST file to another drive?
- Is there a safe way to change the OST file location without losing emails?
These are the most common queries that Outlook users ask when dealing with space issues or performance concerns. Since Outlook stores your mailbox data locally in the Offline Storage Table (OST) file, over time, its size increases, especially when you are dealing with multiple mailboxes or large attachments.
Unluckily, there is no direct approach to change location of OST file in Outlook 365. Here, the EmailsKB platform comes in. We will help you in finding the best possible manual solution to execute the process for free. Besides, we will share all the relevant information about the concern to make you aware for future reference.
Why do I Change Location of OST File in Outlook 365?
Here are the reasons that drive users to change default location of OST file in Outlook:
- Free up space on the system drive: Moving OST files helps in cleaning the OS drive, as Outlook data can store space up to many GBs.
- Improve performance: Placing the OST file on a faster SSD or local drive helps you speed up the Outlook response time.
- Simplify backup & restore: Storing Outlook data on a separate drive makes regular backup easier & safer.
- Prevent profile issues: Organizations use profile redirection or disk quotas, which can reduce the sync issues.
- Maintain organized storage: Keeping large data files on a specific drive helps to maintain a tidy system.
Prerequisites before Moving the OST File Location
Be aware of the prerequisites before changing the OST file location, as it can prevent you from serious consequences.
- It is necessary to back up your current OST file before making changes.
- Check the Outlook version as the method can differ with the installed version.
- It is a good practice to export the crucial data in PST file first to avoid mishaps.
- Close the Outlook application completely. Ensure that it is not running in the background.
- Do not move OST file to cloud or network folders as Microsoft doesn’t support storing OST file.
Important to know:
Follow the steps to locate the current OST file:
- Open Outlook & tap on the File menu.
- Navigate to Account Settings> Account Settings.
- Choose the account under the Data files section.
- Click on the Open File location to access the file.
Proven Ways to Change Location of OST File in Outlook 365
Know the free ways to change Outlook OST file location. But make sure to follow the provided guidelines very carefully, as it can disturb your workflow if executed incorrectly.
Way 1. Create a New Outlook Profile & Set a New OST File Location
This is one of the most reliable & MVPs suggested ways to change Outlook OST file location as it doesn’t require any registry edits or advanced techniques. You can apply this solution across all the available Outlook versions. It is considered the safest & secure for users. Look at the steps below:
- Close the Outlook application.
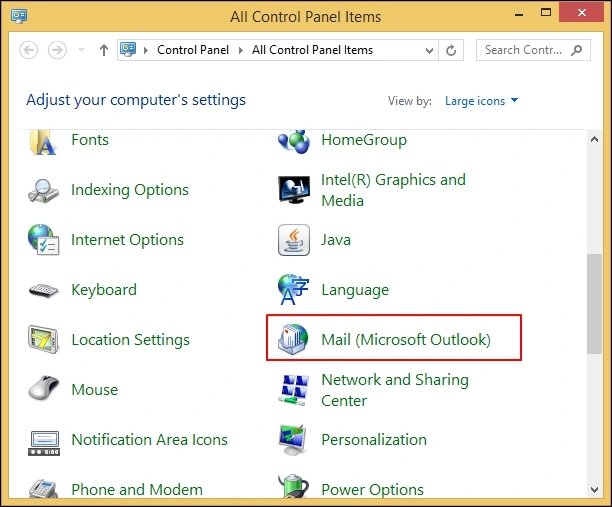
- Press Windows + Q, open Control Panel, & hit Mail.
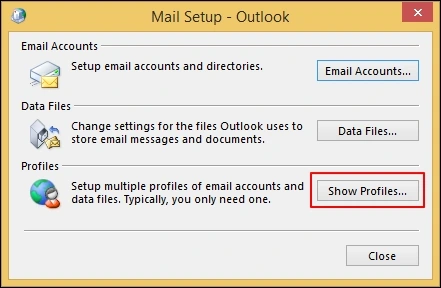
- Choose Show Profiles in the next window.
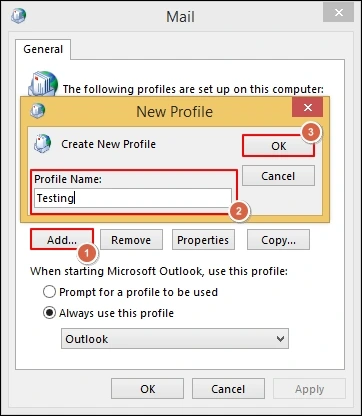
- Tap on the Add option, type your new profile, & click OK.
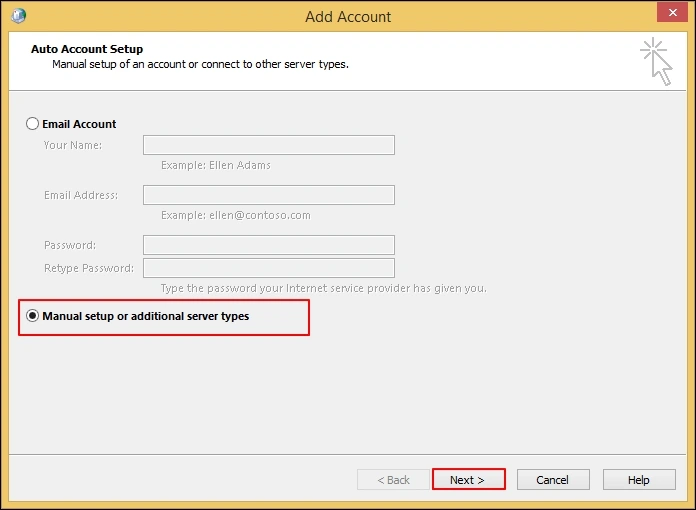
- Select the Manual setup or additional server types under Add account & click Next.
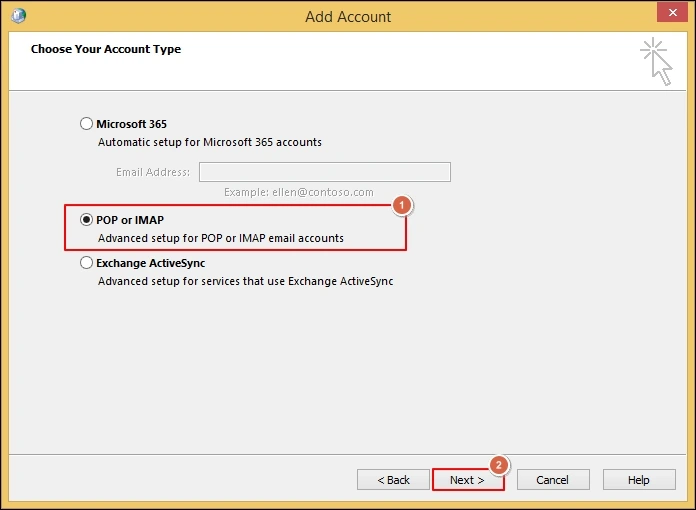
- Choose your Account Type & hit Next.
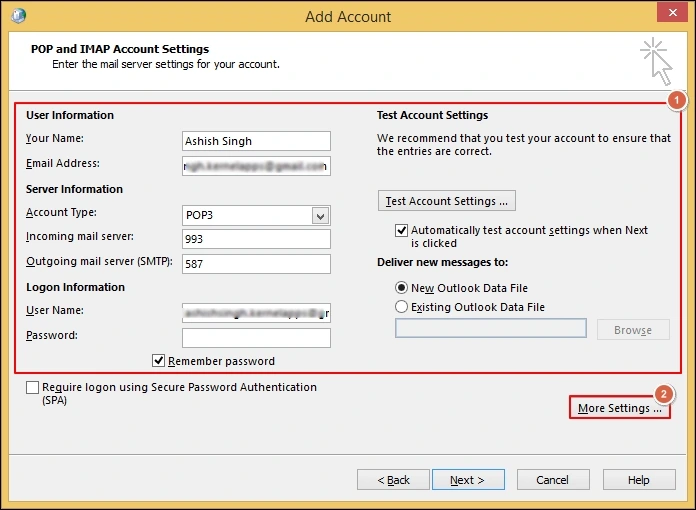
- Provide email account details & click on More Settings.
- Go to the Advanced section & provide the new folder path.
- Complete the setup & click on the Finish option.
- Go to the Mail window, set the new profile as the default one.
- Now restart the Outlook application, as it automatically creates the new OST file at the provided location.
Way 2. Try Registry to Change Default Location of OST File in Outlook
Set up a permanent default OST file location using a registry key. It is beneficial for an IT administrator or advanced users who create new Outlook profiles often. With this change, only the new profile will be affected, not the existing ones.
Note: It is recommended to edit Windows registry carefully as it can lead to Outlook malfunction like issue if mistake happens.
- Close the Outlook application.
- Press Windows + R, type regedit, & click OK.
- Right-click on the Outlook folder & tap on New> Expandable String Value option & name it ForceOSTPath.

- Double-click on the new entry & provide your preferred folder path.
- Close the Registry Editor.
- Create a new Outlook profile; the new OST file will be saved in this location now.
Way 3. Move OST File & Use a Symbolic Link [Advanced Method]
If you want to avoid recreating a new Outlook profile, a symbolic link lets Outlook think the file still exists in its original path while the actual file resides elsewhere. In this, you don’t need to create a new Outlook profile & it is transparent to Outlook, which works immediately.
- Close Outlook & search your existing OST file folder.
- Move the OST file to the new desired folder (e.g., D:\OutlookOST).
- Open “Command Prompt as Administrator”.
- Type the following command and press Enter: mklink “C:\Users\<username>\AppData\Local\Microsoft\Outlook\yourfile.ost” “D:\OutlookOST\yourfile.ost”
- Once linked, restart Outlook as it will use the OST file from the new location now.
Need to Know:
- In older Outlook versions like 2010 or earlier, you can use Cached Exchange Mode to change location of OST in Outlook. Here are the steps:
- Launch the Outlook application & tap on the File menu.
- Go to Account Settings > Account Settings.
- Select your Exchange account > Change > More Settings options.
- Select the Advanced section in the next window.
- Uncheck “Use Cached Exchange Mode” and restart Outlook.
- Go back to the same settings, click the “Outlook Data File Settings”, and provide a new OST path location.
- Re-enable Cached Exchange Mode and restart Outlook.
Troubleshooting Common Issues
This is the add-on section that will help you troubleshoot some common issues. Read below to know more:
- Outlook recreates OST in the old location: Verify if you have edited the correct registry path & restarted Outlook.
- Outlook says file in use or cannot open data file: Make sure that Outlook & all background processes like Teams, Skype are closed before changing the location.
- Sync errors after moving: Delete the OST & let the Outlook rebuild it from the mail server.
- Permissions issues: Ensure your Windows account has full control of the new folder.
Ending Thoughts
Since there is no ‘Move OST button’ to change location of OST file in Outlook, we have discussed all the safe & effective ways to help you in that. Try to follow the suggested steps in the same order to get the desired output. For getting more relevant & tech-oriented solutions, follow the EmailsKB platform.