
Email migration has become a routine practice now for enterprises & individual users to move to cloud-based platforms. In the same way, due to advanced collaboration, enhanced security, & accessibility benefits, users prefer to choose Microsoft Office 365 over the desktop-based Outlook application.
If you are on the same track & planning to migrate Outlook emails to Office 365, this easy guide will be the one-stop solution for you. The EmailsKb platform is known for providing an easy & free to use solution to complex challenges. Read the blog to perform a secure migration with no data loss.
Important to know: The OST file is explicitly used for the specific Outlook account & device that can’t be shared. Therefore, a PST file is used to share the Outlook-related information with other devices or accounts.
Why do Users Migrate Outlook Emails to Office 365?
Check out all the possible reasons that create the need for users to migrate Outlook mailboxes to Office 365:
- Office 365 permits you to access emails anytime, anywhere.
- Migration reduces users’ dependency on local storage & hardware.
- Provides enhanced security with built-in Compliance & threat protection.
- Offers smooth integration with Microsoft Teams, OneDrive, & SharePoint.
- Regular & automatic updates in Microsoft 365 boost organization productivity.
Things to Prepare before Migration
Know the things that users need to go through before starting the migration:
- Backup Outlook data to keep your crucial data safe.
- Maintain a stable internet connection while working.
- Need active Office 365 subscription with assigned mailboxes.
- Make sure that you are working with the healthy Outlook files.
- Required admin access to Office 365 tenants for bulk or business migration.
Tip: Always check the size of the Outlook file & mailbox quota of Office 365 before migration.
Know the Top Methods to Migrate Outlook Emails to Office 365
This section will help you get the complete step-by-step approach of the free & practical solutions to migrate Outlook to Office 365.
Solution 1. Take the help of the Import/Export feature
Here, we will take the help of Outlook’s built-in utility, i.e., Import/Export, to migrate Outlook mailboxes to Office 365. First, we will export the Outlook emails, then import those emails into the Microsoft 365 associated account by using the same Outlook utility. Here are the steps to execute the process safely:
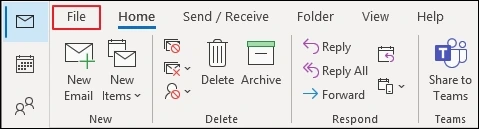
- Open the Outlook application & navigate to the File option.
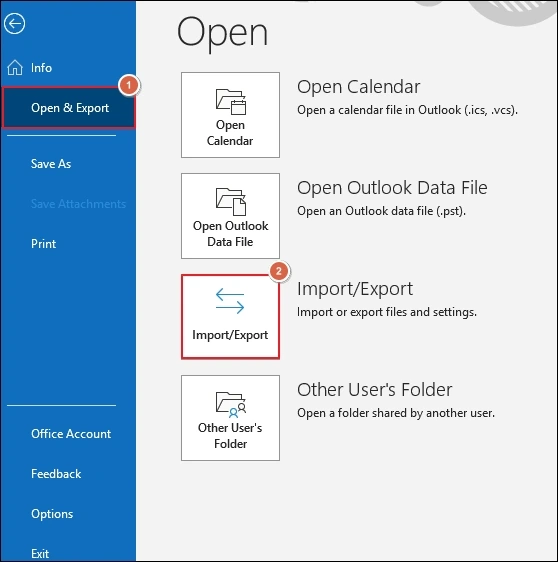
- Go to the Open & Export > Import/Export options.
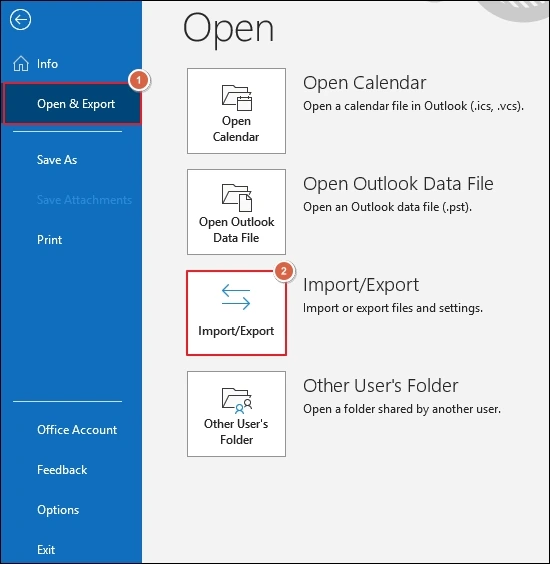
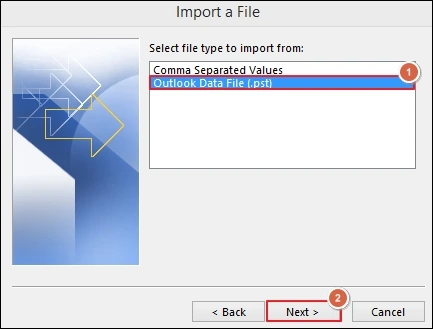
- Choose the Export to a file option & hit the Next option.
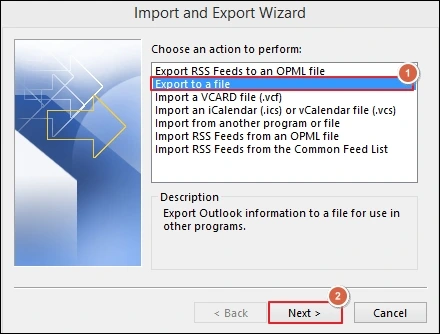
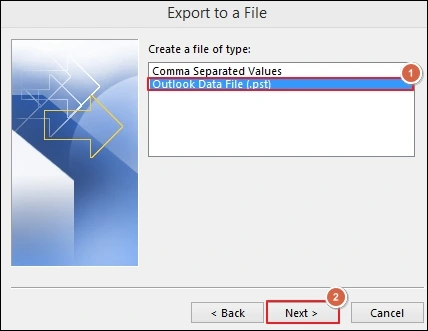
- Click on the Outlook data file (.pst) & tap on Next.
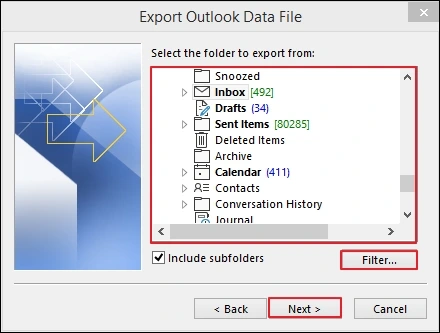
- Choose the folder to export from with the needed filters. Tap on the Next option.
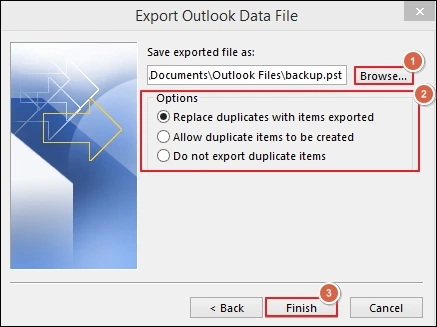
- Provide the saving location with the preferred Options. Hit the Finish option to start the exporting process.
- Once the process is completed, close the Outlook application.
- Again, launch the Outlook associated with the desired Microsoft 365 account & hit the File option.
- Click on the Open & Export> Import/Export options.
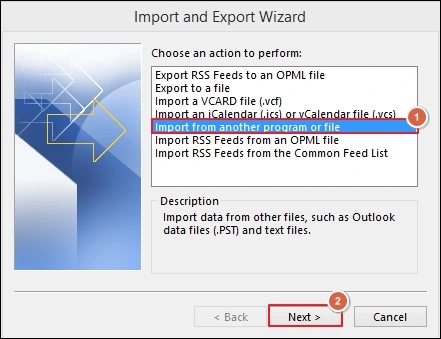
- Select the Import from another program or file & hit the Next option.
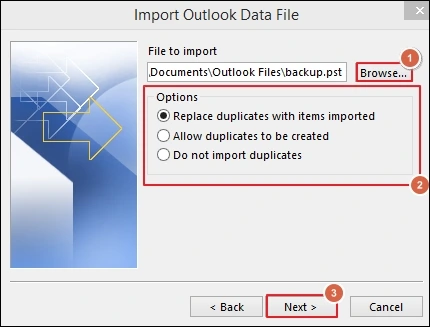
- Use the Outlook data file (.pst) option & click on the Next option.
- Select the file’s location from where you want to import with suitable options. Click on the Next option.
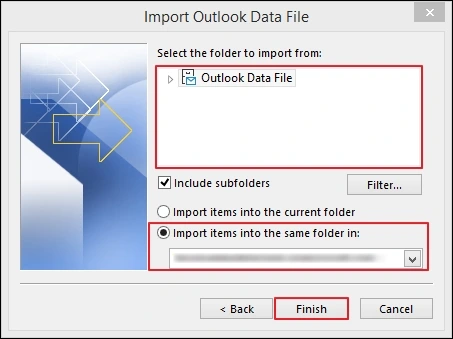
- Select the folders or subfolders to import from with the preferred choices. Then, select the Finish option to complete the process. In this way, you can migrate Outlook to Office 365 for free.
Solution 2. Using the Azure AzCopy Command-line Tool
If you don’t want to use the Microsoft 365 account in the Outlook application, then take help of Azure AzCopy. It is the command-line tool used in Microsoft’s Network upload method to import Outlook PST files to Office 365. First, upload PST files to the Azure Storage location in the cloud by using the AzCopy tool, then import that file into Office 365 by creating the import job.
Go through the steps to use the utility:
-
- Sign in to Office 365 with the administrator credentials.
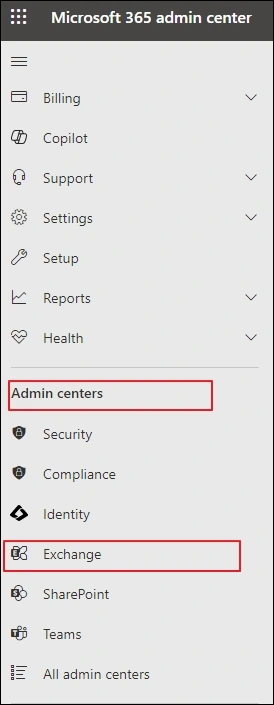
- Choose Admin centers & tap on the Exchange section.
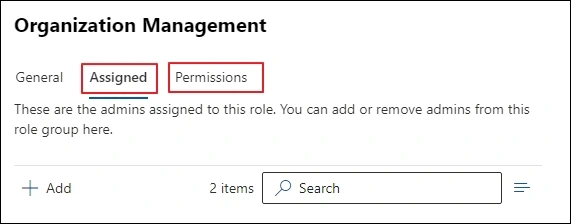
- Tap on the Roles> Admin roles> Organization Management options.
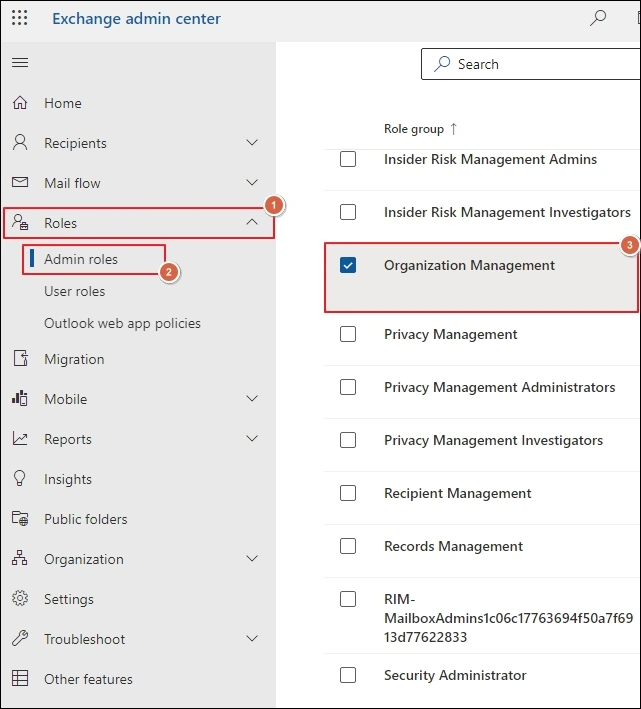
- Choose users for Permissions & Assigned Admin name accordingly.
- Go to the Microsoft 365 Admin centers again & tap on Compliance.
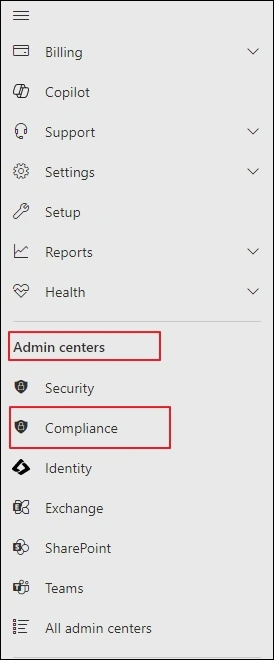
- Select the Data lifecycle management, click on the Microsoft 365> Import options.

- Hit the + New Import job option & then follow the upcoming instructions one by one.
- Click on the PST import job & then hit the Next option.
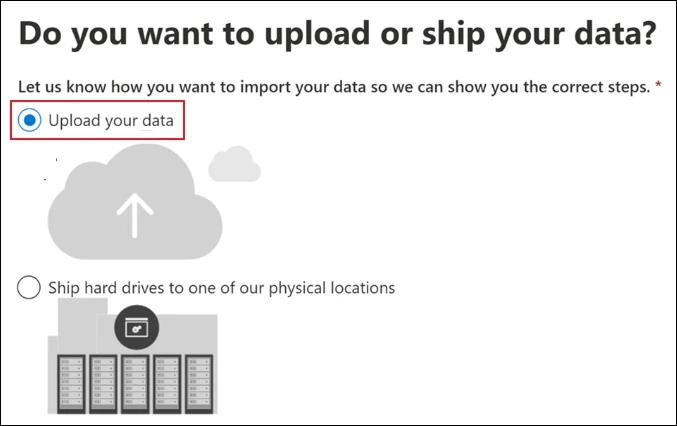
- Go to Upload your data on the next page & hit the Next option.
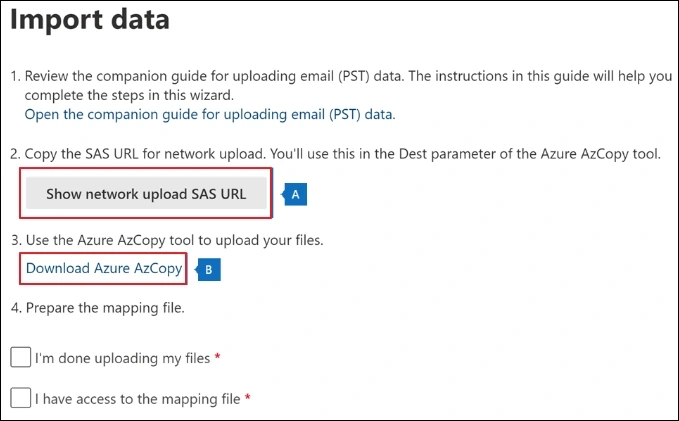
- Tap on the Show network upload SAS URL under the Copy the SAS URL for network upload section. Under Use the Azure AzCopy tool to upload your files, click on Download Azure AzCopy to download the tool onto your system.
- Use the Command Prompt to migrate Outlook emails to Office 365. Go to the directory where you have downloaded the azcopy.exe file. Then, execute the following command:
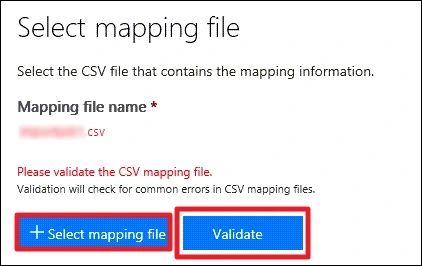
- It saves your PST file to the Azure Storage location. Once uploaded, you need to create the PST import mapping file in a comma-separated value (CSV) file that indicates the user’s mailboxes that need to be imported. Create a job & submit the CSV file accordingly.
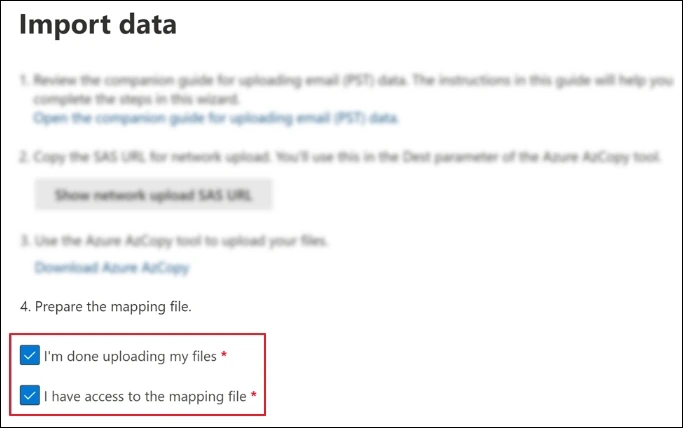
- Under the Prepare the mapping file section, check mark I’m done uploading my files & I have access to the mapping file option.
- Select the mapping file name that you have created in CSV format. Validate the same CSV file to check errors.
- Next, tap on the checkbox after going through the terms & condition documents.
- Then, click on the Save option to submit the job & hit the Close option once the job is successfully executed.
- Click on the Refresh option till the changes to the analysis are completed.
- Select the created import jobs under the Import section of the compliance portal. Hit Import to Microsoft 365. It will display the filters to get the desired data for importing.
- Tap on Import data to start the import job. This way, you can migrate Outlook to Office 365.
azcopy.exe copy “Source location of PST files” “SAS URL”Post Migration Checklist
Make sure you follow this post-migration checklist to ensure the accuracy of the migration:
- Check attachments & sent items.
- Verify email count & folder structure.
- Decommission old PST storage safely.
- Enable security & compliance policies.
- Reconfigure Outlook profiles if needed.
Ending Thoughts
Hopefully, all the discussed free & easy-to-use solutions helped you to migrate Outlook emails to Office 365 easily. Besides, the other highlighted aspects also support you in reducing the chances of error during migration, like a pre- and post-migration checklist. Follow the EmailsKb platform to get practical insights into daily tech challenges.